Growing
How to Do Cannabis Clone: Step by Step Guide

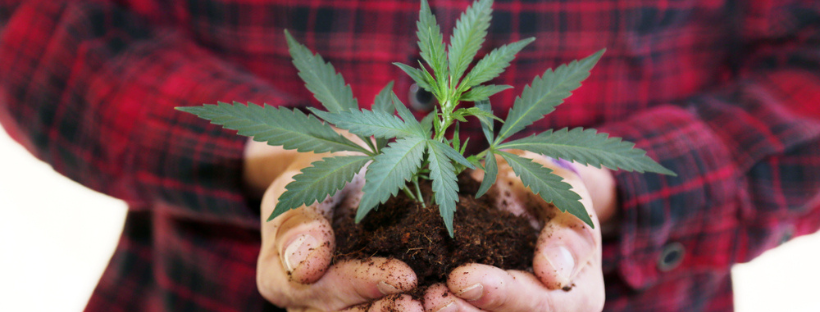
Growing cannabis plants is an exciting experience for any marijuana fan. Not only can you grow your favorite cannabis strains at home, but you’ll often end up with awesome yields that will last you for a while. Plus, while most people initially use cannabis seeds to grow plants at home, you can take cuttings of your grown plants to produce new ones. This is known as cloning.
Cannabis cloning is a good way to continue your growing efforts after you grow your first cannabis plants. You can take cuttings from a mother plant and turn the cuttings into new plants. You can even continue this process with some of your new plants, allowing you to continuously grow more marijuana without needing to buy more seeds.
With that said, cloning your cannabis plants isn’t always straightforward. You’ll need to ensure you know exactly what you’re doing if you want your clones to survive and thrive. You’ll also need to give your clones the right conditions for them to grow into bountiful cannabis plants. Fortunately, we have some advice to help. Here’s a step-by-step guide on how to do cannabis clones.
What Are Cannabis Clones?
Cannabis cloning provides an interesting alternative to growing marijuana plants from seeds. Instead of sprouting a seedling, you generate new plants by taking cuttings from an existing plant and letting these cuttings grow roots. The cuttings are then transplanted into plant containers and grown into marijuana plants.
They’re called clones as the cuttings you take will mimic the plant they’re taken from. As such, if you take cuttings from a White Widow plant, these cuttings will grow into multiple clones of said plant. The plant you take the cuttings from will stop growing after clones are taken – this is known as the mother plant.
Taking cannabis clones can be a stressful process, especially as you’ll need to sacrifice one of your cannabis plants to generate new ones. With that said, it also provides an interesting way to grow high-quality cannabis plants. If you get used to the cloning process, you can continue to clone your best plants and generate huge yields of cannabis.
Cloning involves multiple steps. You’ll first need to prepare your plant before taking cuttings. You’ll then need to place these cuttings in a suitable medium for them to grow roots. Once they’ve developed roots, you can transfer them to a regular plant container and continue to grow them as you would with plants grown from seeds.

Is Using Cannabis Clones Worth It?
If you’re used to growing marijuana plants from seeds, you might wonder whether cloning your cannabis plants is worth it. Although cloning is arguably a more difficult and stressful process, it has a few unique benefits that make it worthwhile. In some cases, cloning may even be a better choice than growing plants from seeds.
One of the main advantages of growing cannabis plants from clones is that you can choose to clone your best plants. Clones retain the exact qualities of their mother plant, so if you choose a mother plant with particularly positive qualities, you’ll end up with multiple great cannabis plants that you can then harvest your weed from.
Of course, another advantage of this is that it can save you money. Instead of regularly buying new cannabis seeds, you can continue to take cuttings from new mother plants and develop them into more cannabis plants. If your plants are healthy and given the right conditions, your clones may even end up better than their parent plants.
Cloning can also save time. Not only do cannabis clones grow faster than seeds, but you’ll know exactly what you’re growing. With seeds, you may need to wait to find out which plants are the healthiest and which plants you need to get rid of. With clones, you can ensure you grow the best plants possible.
Step 1: Choosing Your Cuttings
When it comes to cloning your cannabis plants, you can’t start cutting branches from your plants willy-nilly. You need to cut and clone your plants at a very specific time during their growth. You also need to pick the right plant and the perfect cutting to ensure that your clones grow as successfully as possible.
You’ll need to clone your plant during the vegetative stage – before it starts to flower. Usually, it’s best to clone your plant that’s been growing from a seedling for at least 5 weeks. At this point, it should have multiple side shoots that you can choose from. Cutting a plant once it starts to flower can turn it into a hermaphrodite and stunt its growth, but cutting it too early can cause it to wilt.
The mother plant you choose should be healthy, sturdy, and look like it’s on its way to becoming a bountiful marijuana plant. However, keep in mind that once you take cuttings from the mother plant, the plant will stay in the vegetative stage and won’t continue to grow. Some cannabis growers may see this as a waste, but it’s often a worthy sacrifice to get multiple healthy clones.
As for which branches to clone, look for branches with at least 3 nodes growing from them. These should be healthy enough to grow into new plants. It’s also best to choose straight branches – these are easier to grow and won’t block light from other cuttings. Ideally, your cuttings should be 6 – 10 inches (15 – 25cm) long.

Step 2: Cutting And Soaking
Around three days before you take your cuttings, you should ensure that you keep your mother plant well-hydrated. The cuttings you take will rely on the water stores from the mother plant, so water it regularly to ensure your cuttings survive. It’s best to use distilled water for watering your mother plant.
You should also stop fertilizing your mother plant or feeding it nutrients at this point. Nutrients such as nitrogen can cause your cuttings to try to vegetate rather than root. Allowing a few days for its nitrogen stores to deplete will ensure that your cuttings work as intended and grow successfully.
Once you’ve chosen which branches to use to make clones, you should cut them carefully using a sterilized knife or scissors. You should also wear gloves. Cut each branch at a 45-degree angle at the first node. Using a 45° angle will ensure the branch has a flat surface area for water absorption. Cutting through the nodes helps as this area is full of hormones, making for optimal rooting.
Transfer your cuttings to a large container of purified water to keep them hydrated. It’s best to prepare your container before you take your cuttings. Some growers soak their cuttings for several hours. If you plan to use Rockwool as a growing medium, you should soak them for 12 to 24 hours.
Step 3: Planting Your Cuttings
After taking your cuttings from the mother plant, you’ll need to place them into a suitable growing medium to allow them to grow roots. The easiest medium to use is soil – you can fill plant containers with potting soil and add water to ensure your cuttings get the growing conditions they need. You can also place the cuttings in water (without any nutrients or enhancers) for hydroponic growth.
Using rockwool cubes is another popular method as rockwool provides optimum moisture and airflow. You can spray rockwool cubes with water and they’ll lock in the moisture. Rockwool cubes are generally used with a tray of water along with a tray-cell insert to insert the cubes and a dome to cover them.
Once you’ve prepared your growing medium, take your cuttings from the container of water and carefully dip the cut ends in a rooting hormone. You can use gel or powder-based rooting hormone. This will encourage the plants to produce root cells. Avoid getting any on the rest of the plant.
If you’re using soil or rockwool, dig a small hole in each cube or container, place the root of your cutting in the hole, then lightly push the soil or rockwool around the root to keep it in place. If you’re using the hydroponic growing method, you simply need to place the cuttings in containers with around 5 mm of water around the root.

Step 4: Caring For Your Clones
After planting your cuttings in a suitable growing medium, you’ll need to give them the optimal conditions for them to grow roots. Keeping your clones at a constant warm temperature with high relative humidity levels will help them thrive. Once they’ve successfully rooted, you’ll need to transplant them into plant pots and continue to grow them as you would with your regular cannabis plants.
During the rooting stage, you should keep your clones at a temperature of around 75°F (24°C) with relative humidity levels of 80-85%. Growers often use a plastic humidity dome for this, allowing them to carefully control the conditions the cuttings are exposed to. You should also mist your cuttings with a spray bottle to give them enough hydration.
It’s best to give your clones around 18 hours of light a day. You can do this by placing low-intensity fluorescent lights around 30 inches away from the plants. Too much light can impact the growth of your plants negatively, so make sure to turn the lights off for at least 6 hours a day.
Your plants should grow roots within around 10 to 14 days, although some will reach this stage faster than others. With rockwool and soil, look for white threads sprouting from the growing medium. If you’re using the hydroponic growing method, it’ll be easy to spot roots at the bottom of your cuttings through the water.
Step 5: Transplanting Your Clones
Once your clones have successfully grown roots, you can transplant them into new containers to continue their growth. It’s best to fill 1-gallon pots with a suitable potting medium. Soilless peat is recommended as it’s usually more sterile than soil. Fill your pots with your potting medium up to an inch below the rim.
You should break your potting medium into chunks and water it thoroughly to ensure your plants will get enough water. You can also add nutrients at this point, although it’s best not to use too many during the early stages of your plant’s growth. Dig a hole in each plant container that’s big enough to fit your clones.
To transplant your clones from rockwool or soil, gently lift them from their original containers and place them into the hole in one of your new containers. Surround the clone with your potting medium firmly. If you’re transplanting your clones from water, you can use a much smaller hole. Remember to sterilize your equipment and wear gloves to avoid contaminating your plants.
After transplanting your clones, you can continue to grow them just as you would with regular cannabis plants grown from seeds. This involves giving them the right levels of heat, light, and humidity for them to vegetate and flower. You can continue to take cuttings from one of your new plants but, since it will stop the plant from growing, choose carefully and avoid doing this too often.
Conclusion
Cloning your cannabis plants is an excellent alternative to growing cannabis plants from seeds. After all, you can end up with multiple clones of your best plant, resulting in plenty of high-quality weed. It can also save you time and money, although you’ll need to ensure you handle the process carefully.
Although it has its benefits, cloning isn’t always the best idea. You’ll need to sacrifice a mother plant to grow your clones, and there’s also no guarantee that your clones won’t be affected by stress, pests, or other issues. The process can also be stressful for growers, and some may choose to stick to cannabis seeds.
Fortunately, whether you choose to grow cannabis plants from clones, or seeds, or avoid the growing process altogether, you can always buy high-quality weed when you need it. Consumers in NY and DC can now order cannabis online from Purple Penthouse, along with a range of edibles, concentrates, vapes, and more.